How to Save a Screenshot as a PDF on Windows 10 Desktop 2024


There are multiple ways to take screenshots on Windows 10, and even more ways to save and turn those screenshots into a PDF.
We’ve compiled the best and easiest ways to save screenshots as PDFs on Windows desktop. And we’ve even recommended our preferred way to save screenshots as a PDF.
Stay tuned for the best ways to turn a screenshot into a PDF.
How to Take a Screenshot on Windows 10 Desktop
First, let’s cover how to take screenshots on Windows 10:
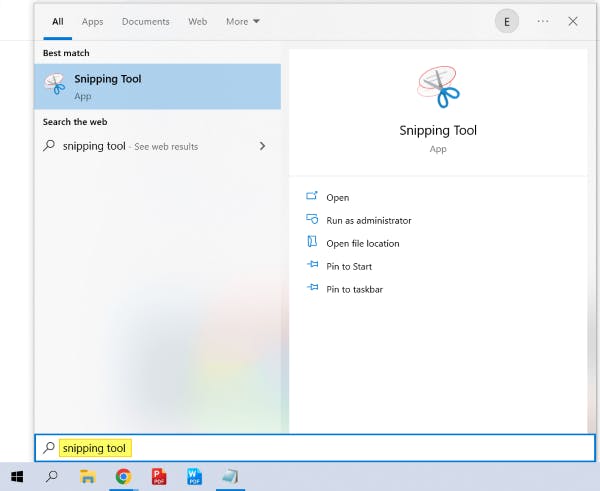
1. Press [Windows button] + [shift] + [s] on keyboard (OR press [Windows key] > type “Snipping Tool” > [enter]).
2. Use the cursor to click-and-drag until everything is in your desired screenshot.

3. Click the thumbnail that pops up in the bottom right corner of the screen.

4. Press the Save button, and save your screenshot as an image (PNG or JPG).
How to Save a Screenshot as a PDF
Now that we know how to take a screenshot on Windows 10, let’s explore the best ways to turn that screenshot into a PDF.
Built-in Windows Tools (Snipping Tool/Snip & Sketch)
Note: The Windows Snipping Tool and Snip & Sketch tool are being combined in Windows 11 for a new and improved Snipping Tool. We'll use "Snipping Tool" in this blog post, but Snip & Sketch will work just as well in older versions of Windows, such as Windows 10.
1. Press [Windows button] + [shift] + [s] (OR press [Windows key] > type “Snipping Tool” > [enter])
2. Use cursor to click-and-drag until everything is in your desired screenshot.
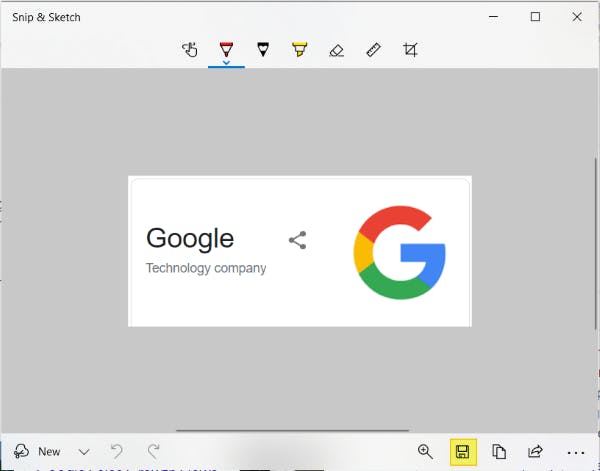
3. Click the thumbnail that pops up in the bottom right corner of the screen.
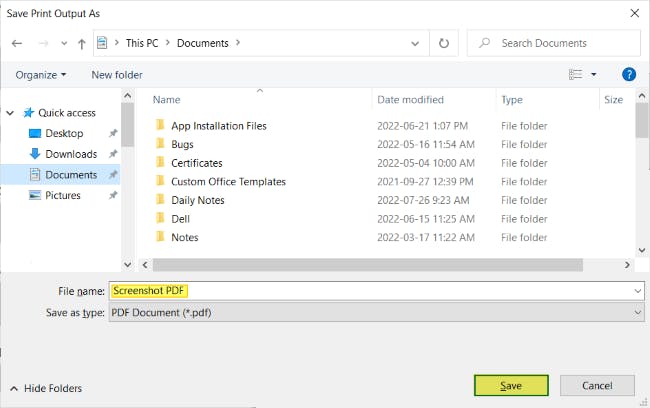
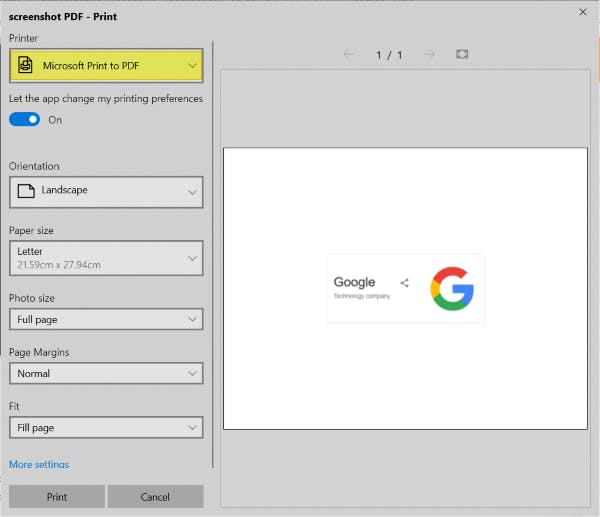
4. Press [ctrl] + [p] on your keyboard.
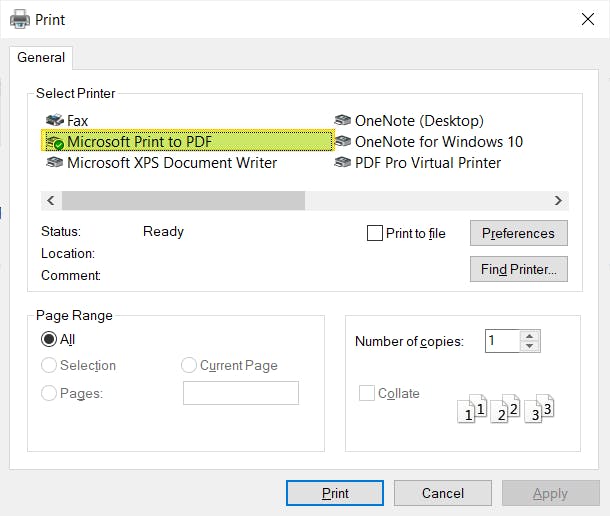
5. Set the Printer as Microsoft Print to PDF (if it isn’t already).
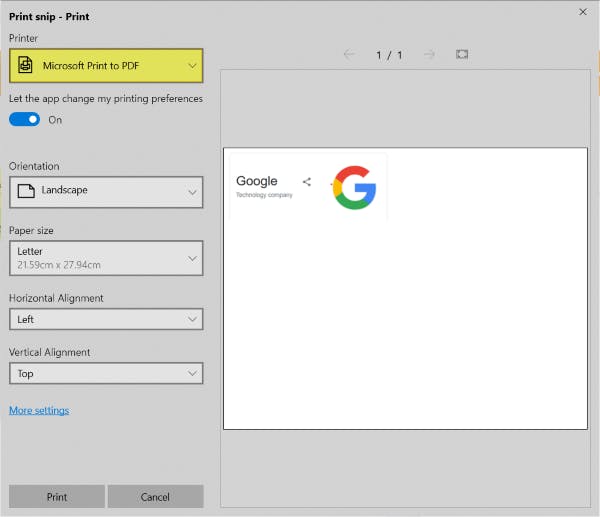
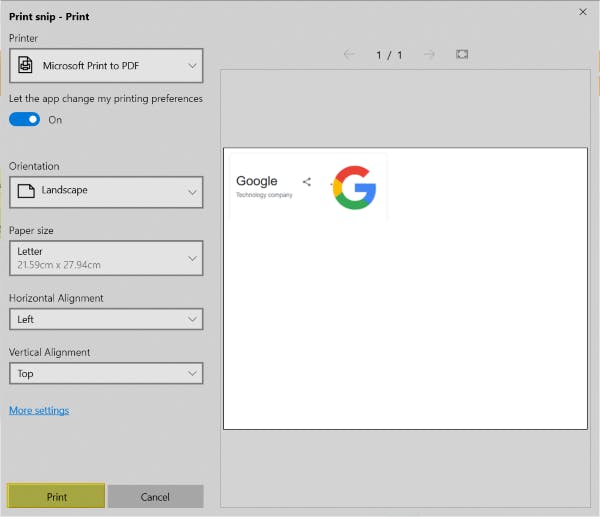
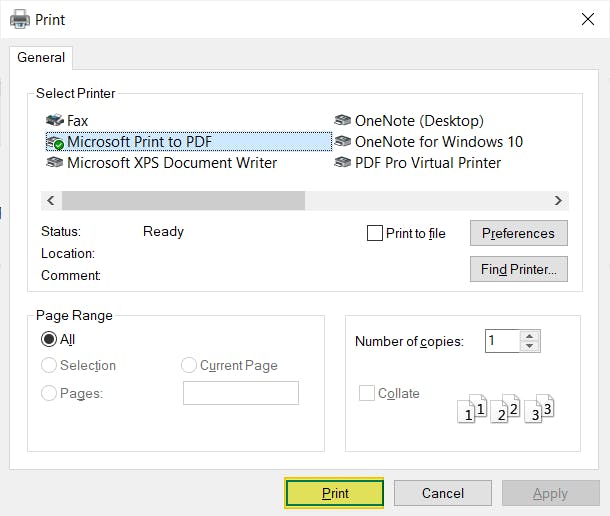
6. Press Print.
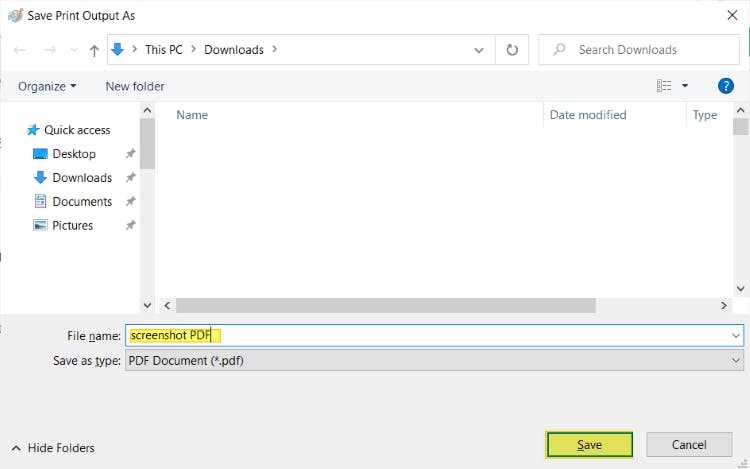
7. Name your new PDF, then press Save.
Windows Photos
1. Open your saved screenshot in the Windows Photos application. (Right-click > Open with > Print).
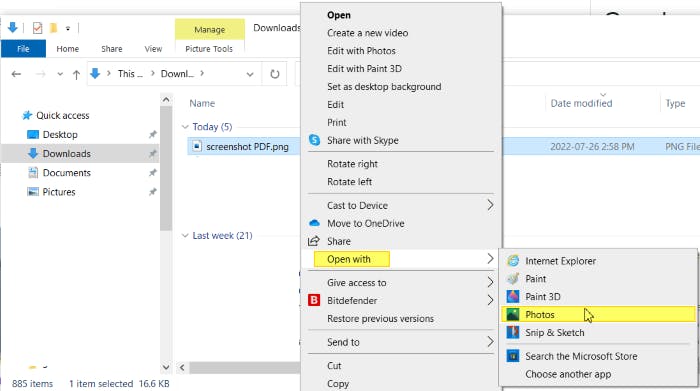
2. Press the Print button or [ctrl] + [p] on your keyboard.
3. Set the Printer as Microsoft Print to PDF (if it isn’t already).
4. Press Print.

5. Name your new PDF, then press Save.
Paint
1. Right-click on the screenshot file > Open with > Paint.
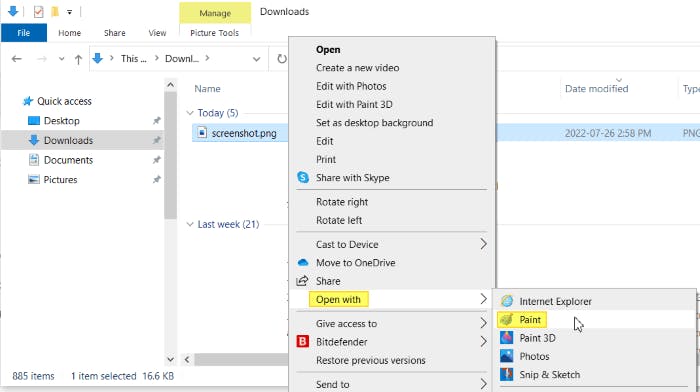
2. Press [ctrl] + [p] on your keyboard.
3. Select Microsoft Print to PDF as the Printer (if it isn’t already).
4. Press Print.
5. Type a name for the new PDF, then press Save.
With a PDF Editor — PDF Pro
If you’re looking for a PDF editor that’s able to turn screenshots and images into PDF (or other file formats), then PDF Pro has what you need. Instantly convert images to PDF, extract text from images and scanned documents, and more. Try PDF Pro for free today
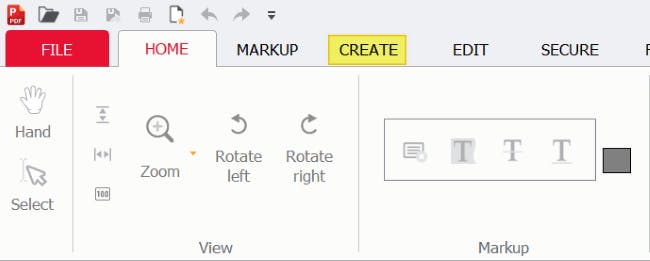
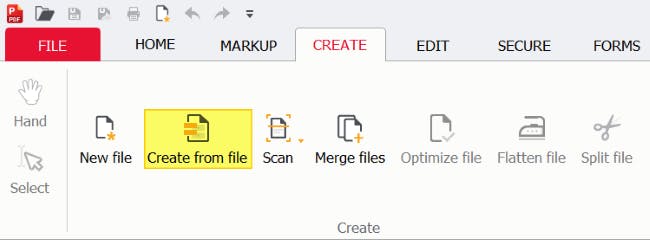
1. In PDF Pro, press the Create tab.
2. Press the Create from file button.
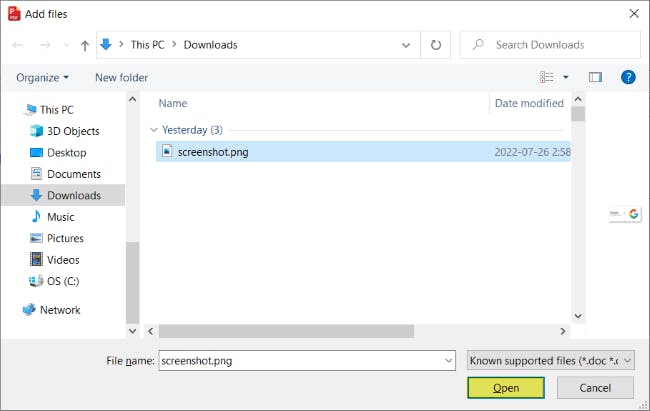
3. Add files (or +) buttons.

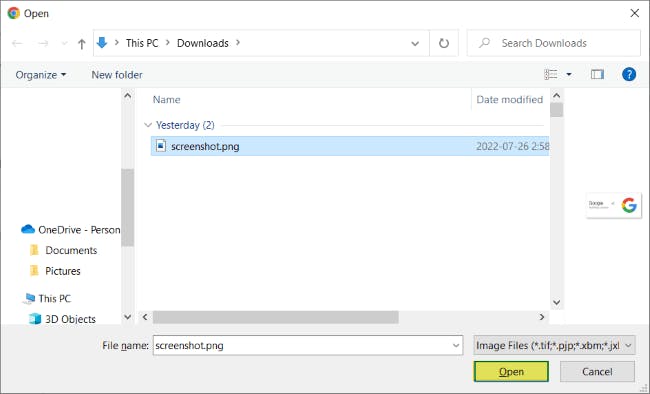
4. Find the saved screenshot, then press Open.
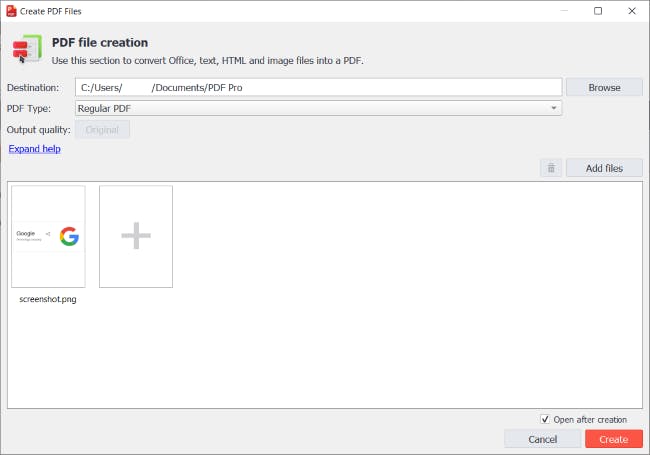
5. Create button.
With Adobe Acrobat
The household name when it comes to PDFs. While it can turn screenshots into PDFs, the expensive annual subscription, confusing interface, and number of features often makes it overkill and more confusing than necessary.
- Open Adobe DC.
- Open the image file.
- Click the Create PDF tool.
- Select the image fine.
- Press Start/Create.
How to Turn a Screenshot into a PDF with Word, PowerPoint, or Google
You can also use Microsoft Word and PowerPoint to turn screenshots into PDF. If you don’t have access to Word or PowerPoint, Google Docs and Google Slides work just as well, and are free to use.
Microsoft Word
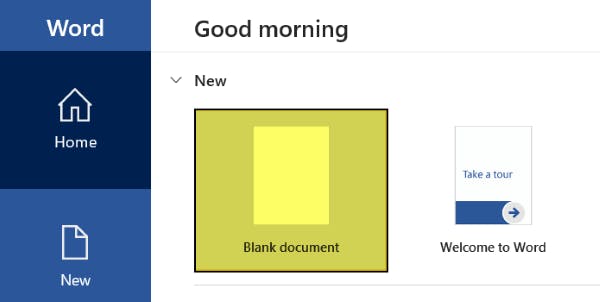
1. Launch Microsoft Word, then press Blank document.
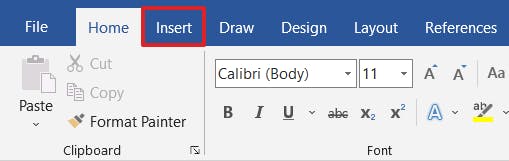
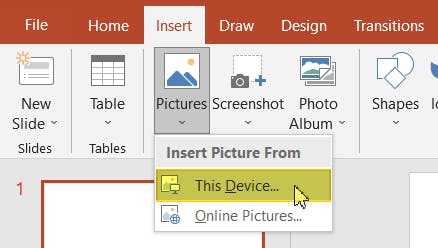
2. Click the Insert tab.
3. Click Pictures > This Device.
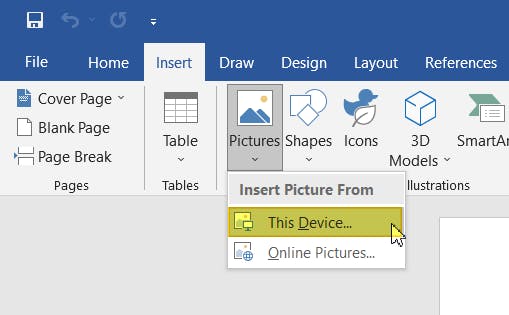
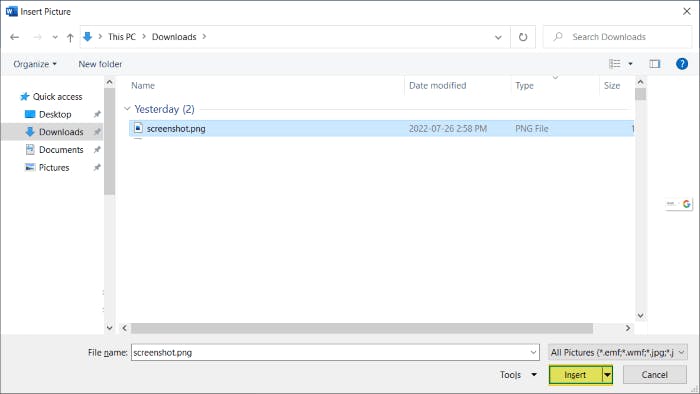
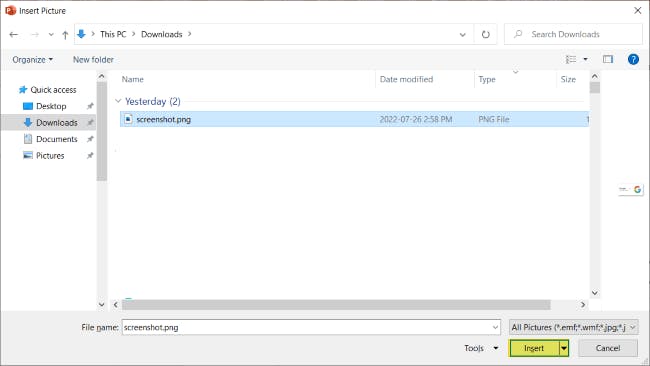
4. Find the image, then press Insert.
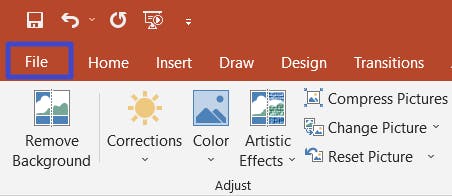
5. Press the File menu.
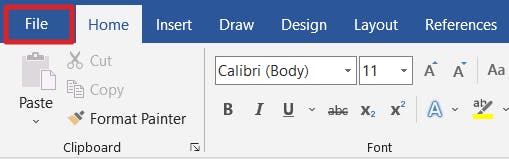
6. Click Export, then press Create PDF/XPS.
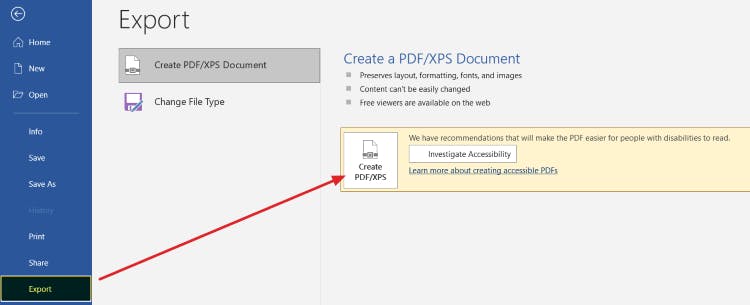
7. Name file, then press Publish.
Microsoft PowerPoint
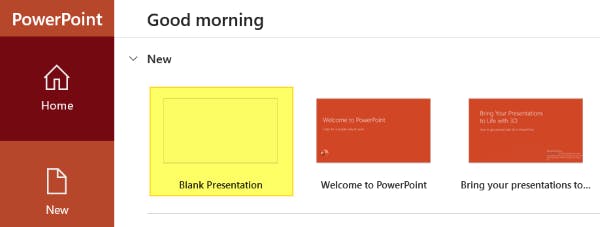
1. Launch Microsoft PowerPoint, then press Blank Presentation.
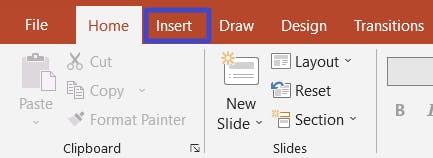
2. Click the Insert tab.
3. Click Pictures > This Device.
4. Find the image, then press Insert.
5. Press File.
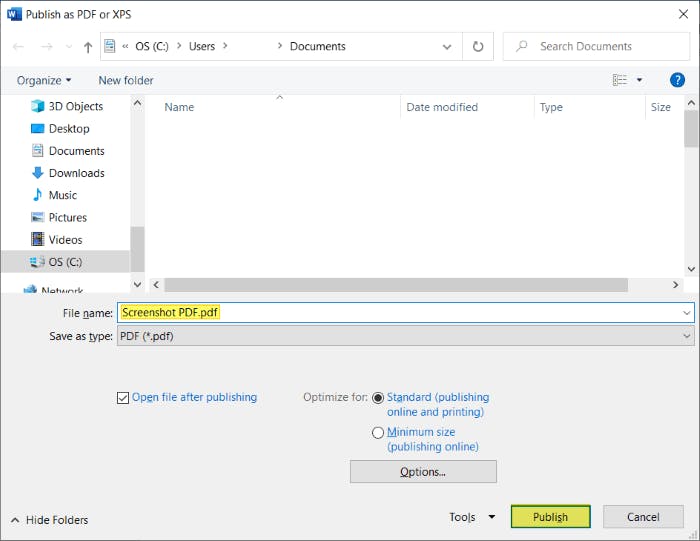
6. Click Export, then press Create PDF/XPS.
![]()
7. Name the new PDF file, then press Publish.

Google Docs
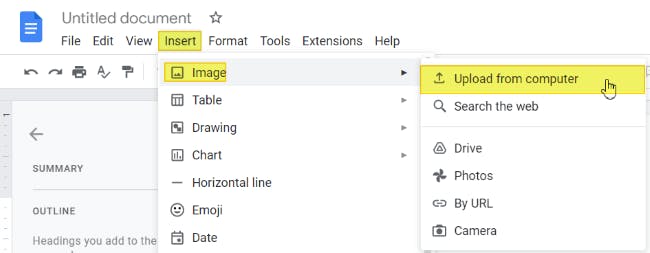
1. Open a blank Google Doc.
2. Click Insert tab > Image > Upload from computer.
3. Find and Open your saved screenshot.
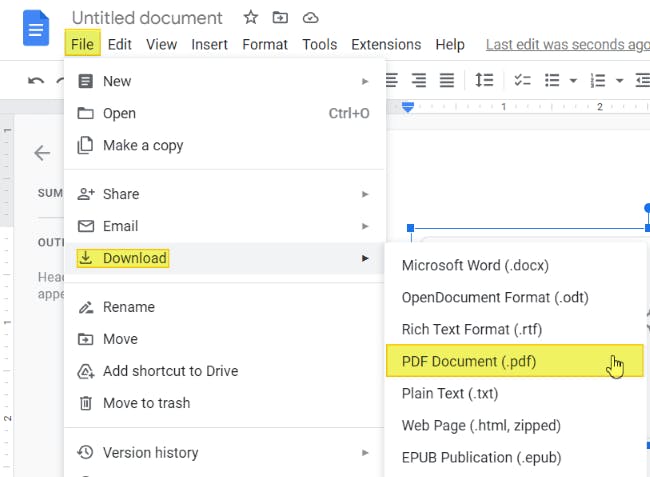
4. Press File > Download > PDF (.pdf).
Google Slides
1. Open a blank presentation in Google Slides.
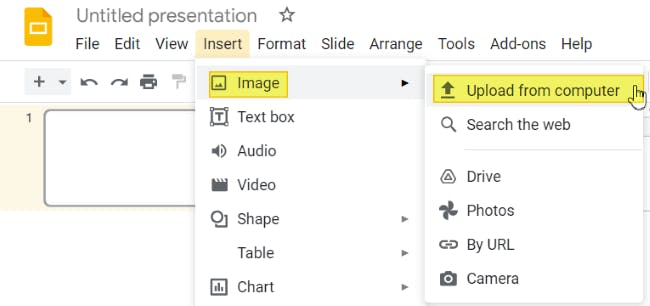
2. Click Insert tab > Image > Upload from computer.
3. Find, select, and Open saved screenshot.
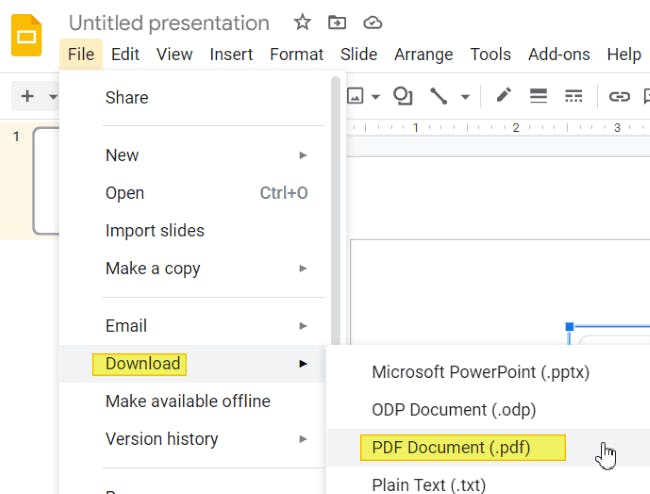
4. Press File > Download > PDF (.pdf).
How to Combine Screenshots into One PDF
To combine screenshots into one PDF, you'll need to use a PDF editor, or an online tool to convert and combine your screenshots.
Online PDF Combiner
To combine screenshots into a PDF, you may first need to convert those screenshots to PDF, then combine them afterwards.
There are many online tools to choose from. Be sure to use ones that you trust!
In this example, we'll use our online PDF to Image converters, and our PDF Combiner, which are 100% free, fast, and safe!
- Visit our JPG to PDF or PNG to PDF tool, depending on the file format of your screenshots.
- Upload your images, then follow the on-screen prompts to convert your screenshots into PDF.
- Download all the new PDFs.
- Visit PDF Pro's PDF Combiner.
- Upload all the PDFs.
- Press Merge.
- Download your new PDF.
That's it! You now have a PDF containing all your screenshots.
PDF Editor
The best way to combine multiple screenshots into one PDF is by using a dedicated PDF editor.
A good PDF editor will be able to convert and combine multiple screenshots into one PDF, at the same time. In this example we'll use PDF Pro, but the method will be similar in your PDF editor of choice. Try PDF Pro for free today.
- In PDF Pro, press the Create tab.
- Press Merge files.
- Press Add files (or the + symbol).
- Find and Open the screenshots you'd like to convert and combine into a PDF.
- Press Create.
That's it! You now have a PDF containing all your screenshots.
Instantly Turn Screenshots to PDF with PDF Pro!
Have you ever needed to take a screenshot and turn it into a PDF file on Windows? Now you can!
We’ve shown you the best ways to take screenshots and save them as PDFs. But our recommended way to turn a screenshot into a PDF is with: PDF Pro.
PDF Pro is our affordable all-in-one PDF editor, creator, and converter. Convert images and other files to PDF, scan documents, extract text from scanned documents and images, all with PDF Pro!
For example, if just finished saving multiple screenshots as PDF files, you can use our PDF Combiner to combine your screenshots into a single PDF! Making it more organized, and easier to share or send to others.
Below are some of the other reasons that make PDF Pro so awesome.
Features of the program:
- Delete PDF pages
- Create PDFs
- Crop PDFs
- Fill out forms
- Add text to PDFs
- Add images to PDFs
- Add watermarks to PDFs
- Add hyperlinks to PDFs
- Extract text from PDFs
- Make PDFs Editable
- Make PDFs searchable
Try PDF Pro for free or Buy Now!


Discover PDF PRO
PDF Pro is a desktop software for Windows & Mac distributed by PDF Pro Software Inc. The software "PDF Pro" and the company "PDF Pro Software Inc." are in no way affiliated with Adobe. The PDF file format is an open file format published under ISO 32000-1:2008
© 2017 - 2025, PDF Pro Software Inc. All rights reserved.